Hello everybody, it’s me, Dave, welcome to our recipe site. Today, we’re going to make a distinctive dish, red velvet brownies. One of my favorites. For mine, I am going to make it a little bit unique. This is gonna smell and look delicious.
Red Velvet Brownies is one of the most well liked of current trending foods in the world. It’s easy, it’s quick, it tastes delicious. It’s appreciated by millions every day. Red Velvet Brownies is something that I have loved my entire life. They are fine and they look wonderful.
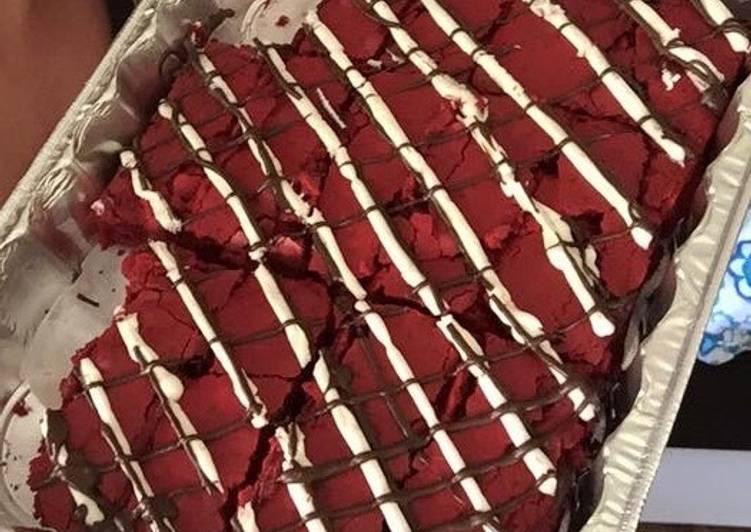
Decadent red velvet brownies swirled with cheesecake. After months and months deciding what kind of homemade red velvet recipe would be my first, I finally settled on a swirly brownie recipe. "A chewy, light, red velvet brownie full of that classic red velvet flavor. I was suppose to post these delicious, chewy homemade red velvet brownies around Christmas time and forgot all about them!
To begin with this particular recipe, we have to first prepare a few components. You can cook red velvet brownies using 9 ingredients and 4 steps. Here is how you cook that.
The ingredients needed to make Red Velvet Brownies:
- Get 1-1/2 cup unsalted butter, at room temperature
- Make ready 1-1/2 cups granulated sugar
- Make ready 1-1/2 cups Brown Sugar
- Prepare 4 Large Eggs, at room temperature
- Prepare 2 oz Red Food coloring (optional) n
- Make ready 4 teaspoon Pure Vanilla extract
- Get 2-1/2 cups all-purpose flour
- Make ready 6 teaspoon unsweetened cocoa powder
- Take 1/2 teaspoon salt
Our red velvet brownies are a bite-size version of the classic red velvet cake. Top them with cream cheese frosting for the ultimate holiday dessert. Red Velvet Cheesecake Brownies - A rich and cakey red velvet brownie base, topped by an amazing creamy cheesecake layer, then more brownie batter swirled into the cheesecake. Last week we did an unusual dinner date with ten of our friends.
Instructions to make Red Velvet Brownies:
- Preheat oven 350 degrees Butter and flour an 9 X 13 clear glass baking pan
- In a small bowl of a stand mixer fitted with a paddle attachment beat together the butter and sugar on medium speed until light and fluffy. About 2 minutes. Add eggs one at a time, mixing well after each addition, then stir in food coloring (if not using food coloring add 4 tablespoons water or milk) add vanilla, mix until fully incorporated.
- Mix flour, cocoa and salt in a separate bowl. Slowly add in the flour mixture, being very careful not to over mix. Mix until the color is fully incorporated. Mix (DO NOT OVER MIX) the batter. The batter will be very thick
- Remove the bowl from mixer stir up the batter with a rubber spatula once or twice just to ensure all of the flour has incorporated from the sides and there isn't anything stuck on the bottom of the bowl. You'll want one uniform color (red) batter Pour the batter into the prepared pan and bake 30 -40 minutes for a thin crust on top and gooey underneath Set aside to cool, cut into bars and serve.
It was at restaurant by the beach in a private room in the back where they host a "Dinner in the Dark". Moist, lightly chocolately red velvet brownies have a delectable swirl of cream cheese filling inside. Reviews for: Photos of Red Velvet Cheesecake Swirl Brownies. Dense red velvet brownie topped with creamy oreo frosting, chocolate ganache and oreo cookie crumbles. From raspberry red velvet cupcakes to homemade red velvet pudding, nothing says "Valentine's Day" like a confection that's the Red velvet brownies would be spectacular, but I just couldn't stop there.
So that’s going to wrap this up for this exceptional food red velvet brownies recipe. Thank you very much for your time. I am confident that you will make this at home. There’s gonna be more interesting food at home recipes coming up. Don’t forget to save this page in your browser, and share it to your family, friends and colleague. Thanks again for reading. Go on get cooking!