Hello everybody, I hope you are having an incredible day today. Today, I’m gonna show you how to prepare a special dish, brenda's blackberry scones. It is one of my favorites. This time, I’m gonna make it a bit tasty. This will be really delicious.
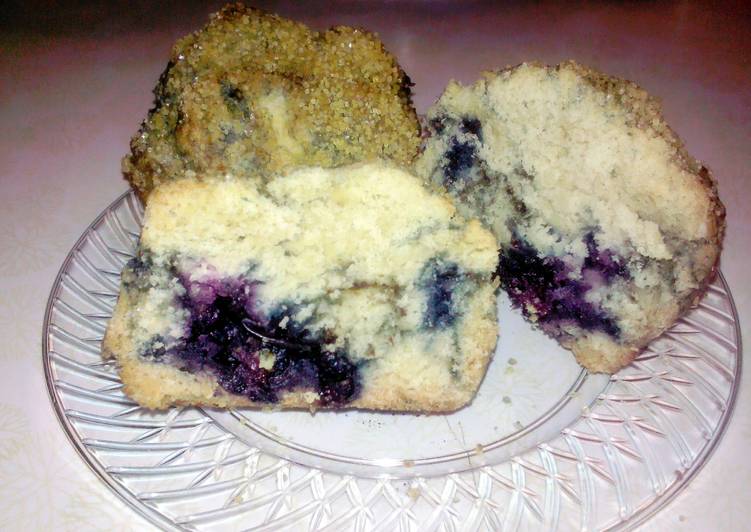
Brenda's Blackberry Scones is one of the most well liked of current trending foods in the world. It’s appreciated by millions every day. It is simple, it is fast, it tastes yummy. Brenda's Blackberry Scones is something which I have loved my whole life. They are nice and they look wonderful.
So we were able to time it so that both were finished baking at the same time. I could get used to still-warm fresh blackberry scones for dessert! If you've never baked scones at home, you'll be pleasantly surprised by how easy they are to make.
To begin with this particular recipe, we have to first prepare a few ingredients. You can have brenda's blackberry scones using 11 ingredients and 10 steps. Here is how you can achieve it.
The ingredients needed to make Brenda's Blackberry Scones:
- Prepare fresh blackberries, blueberries or other fresh ripe fruit
- Take all-purpose flour
- Get granulated sugar
- Prepare baking powder
- Get baking soda
- Get kosher salt
- Make ready (2 sticks) cold unsalted butter, cubed
- Prepare vanilla
- Prepare buttermilk
- Prepare cane sugar
- Prepare coconut rum
With butter, cream and loads of berries, these Fresh Blackberry Scones are a moist, delicious breakfast treat! Best fresh, make these homemade scones ASAP. Whether you adapt this recipe to make Blueberry Scones or Mixed Berry Scones, the basic formula is a winner! This will become your go-to Easy Scones Recipe!
Steps to make Brenda's Blackberry Scones:
- About 2 hours before making the scones, scatter the berries or fruit on a cookie sheet and put in freezer. (If large berries cut in half)
- Whisk together the flour, sugar, baking powder, baking soda, and salt, and drop in the cubed butter. Put the bowl in the freezer and leave it there for 30 minutes.
- Adjust the oven rack to the middle position and preheat the oven to 375°F. Line regular or jumbo cupcake tins and set aside.
- Using a pastry cutter or two knives, work the chilled ingredients together in the bowl until the butter cubes are the size of peas.
- Make a well in the center. Combine the rum, vanilla and buttermilk in a separate bowl, and pour the mixture into the well. Mix the ingredients with a wooden spoon to form a shaggy, slightly crumbly mass.
- Add the frozen fruit and gently mix them in, trying not to crush them.
- Scoop a small spoonful into your hand and press it into a tall, fat puck shape and put it in the prepared muffin papers.
- Sprinkle the tops of the scones with the cane sugar.
- Bake for 15 minutes or until they are golden brown around the sides but still tender in the middle.
- Transfer the scones to a cooling rack and let them cool for at least 10 minutes before serving. Cool completely before storing in a loosely covered container. Store for up to three days, because of the fruit they will mold quickly, so eat them fast! :-)
For my husband, vacation means one thing: Time away from the city, preferably in mountains that have views of the sea and the smell of sage. Last summer we decided to go whole hog and guzzle up the concentrated beauty of northern California, with a swing through Big Sur, quite likely one of the most extravagantly lovely places in the world. Scones are originally from Great Britain, and are traditionally served at tea time with butter, cream and jam. The scones are most often plain, although sometimes dried currants or raisins are added in. These fruity blackberry scones are an American adaptation, where mix-ins like fruit or chocolate are much more the norm.
So that is going to wrap this up for this special food brenda's blackberry scones recipe. Thanks so much for your time. I’m confident you can make this at home. There is gonna be more interesting food at home recipes coming up. Remember to save this page in your browser, and share it to your family, friends and colleague. Thank you for reading. Go on get cooking!