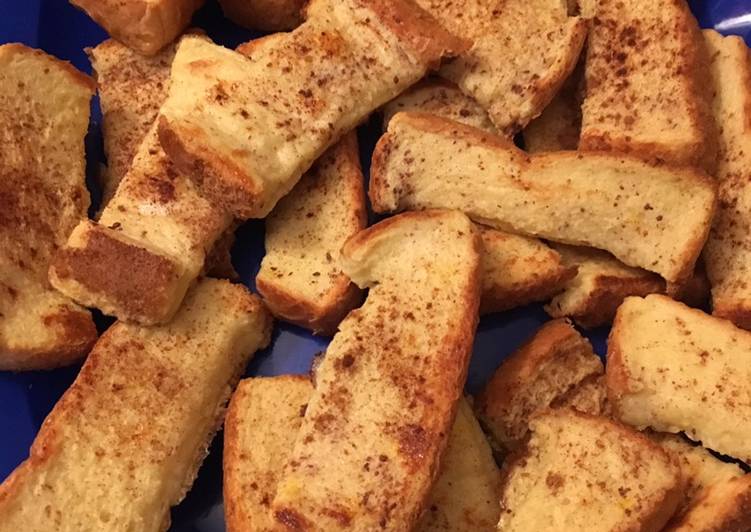
Hey everyone, hope you are having an incredible day today. Today, I’m gonna show you how to prepare a distinctive dish, baked french toast sticks (freezer-friendly). One of my favorites food recipes. For mine, I am going to make it a little bit tasty. This will be really delicious.
Baked French Toast Sticks (Freezer-Friendly) is one of the most favored of recent trending foods in the world. It’s simple, it is quick, it tastes yummy. It is enjoyed by millions every day. Baked French Toast Sticks (Freezer-Friendly) is something which I’ve loved my entire life. They’re nice and they look wonderful.
French toast sticks are a great make-ahead breakfast that you could have on hand in the freezer rather than buying the store-bought kind. And if you wanted to make them healthier you could use hearty whole grain bread and cut back on the sugar and syrup. Try this baked French toast recipe.
To get started with this particular recipe, we must first prepare a few components. You can cook baked french toast sticks (freezer-friendly) using 8 ingredients and 8 steps. Here is how you can achieve it.
The ingredients needed to make Baked French Toast Sticks (Freezer-Friendly):
- Take 8 slices thick-cut Texas toast bread
- Make ready 3 large eggs
- Get 1 1/2 cups whole milk
- Make ready 1 teaspoon ground cinnamon
- Make ready 2 Tablespoons sugar
- Prepare 2 teaspoons vanilla extract
- Get Cooking spray
- Prepare Maple syrup, for serving
Simple Cinnamon French Toast Sticks that freeze well too and make breakfast easy to get ready for your kids in the mornings before school. These french toast sticks are super easy and cheap to make. Did I also mention they're freezer friendly? It will keep the french toast sticks from drying out and lengthen their freezer life.
Instructions to make Baked French Toast Sticks (Freezer-Friendly):
- Preheat the oven to 350°F. Line a baking sheet with foil and grease it with cooking spray.
- Cut each slice of bread into three sticks widthwise.
- In a large shallow dish or bowl, whisk together the eggs, milk, cinnamon, sugar and vanilla extract.
- Dip each stick of bread in the egg mixture, coating it on all sides, then shake off the excess and arrange it on the baking sheet. Repeat the dipping process, arranging the French toast sticks on the baking sheet so that they aren’t touching.
- Bake the French toast sticks for 12 minutes then flip them once, spray them lightly with cooking spray and return them to the oven for an additional 12 to 15 minutes or until cooked through.
- Remove the French toast sticks from the oven and serve warm with maple syrup.
- To freeze the French toast sticks for quick reheating, bake them as directed then cool completely and package in a sealable plastic bag. To reheat, remove frozen French toast sticks from the freezer and microwave for 30 to 60 seconds until warmed through. (I did some in sandwich bags then the ziplock bag, that way I can just pull one or two bags out, or the kids can just grab them)
- This was frozen for 3-4 days before I used any… this worked out great, now the kids can grab and go lol and make their own….
Cook these on a lightly greased parchment lined baking sheet one inch apart. Freeze fried or baked French toast sticks for later use. Spread the French toast sticks onto a clean baking sheet. To freeze: Let the French toast sticks cool and then place onto a baking sheet and freeze. When frozen, transfer to a freezer safe container.
So that is going to wrap this up for this exceptional food baked french toast sticks (freezer-friendly) recipe. Thank you very much for reading. I am confident that you can make this at home. There is gonna be more interesting food at home recipes coming up. Don’t forget to save this page on your browser, and share it to your loved ones, friends and colleague. Thanks again for reading. Go on get cooking!