Hey everyone, hope you’re having an incredible day today. Today, I’m gonna show you how to prepare a special dish, homemade paneer (cottage cheese). One of my favorites. This time, I’m gonna make it a bit unique. This is gonna smell and look delicious.
Homemade Paneer (Cottage cheese) is one of the most popular of current trending meals on earth. It is simple, it is quick, it tastes delicious. It is enjoyed by millions daily. They’re fine and they look fantastic. Homemade Paneer (Cottage cheese) is something which I’ve loved my whole life.
Paneer is a star ingredient that tastes even better when made from scratch at home! Considering how I eat paneer almost every second day of my life, this was a huge missing piece on. Paneer is a fresh cheese made by curdling heated milk with any acids such as lemon juice, vinegar, citric acid or curd.
To get started with this particular recipe, we must first prepare a few components. You can have homemade paneer (cottage cheese) using 2 ingredients and 10 steps. Here is how you can achieve it.
The ingredients needed to make Homemade Paneer (Cottage cheese):
- Take 1/2 Litre Milk
- Take 1/4 Lemon
If you have a pot, a strainer, and. Easy steps to make homemade paneer or cottage cheese at home from scratch. Make paneer from broken milk where the whey separates from milk while boiling. Paneer/cottage cheese gets collected in muslin cloth.
Steps to make Homemade Paneer (Cottage cheese):
- Take 1/2 litre milk and allow it to boil on medium flame.
- When the milk boils, add lemon juice to it and stir. You can see the curds separating from the milk. Keep it covered with the lid for 3-4 minutes till the entire curd is separated from the whey.
- Place a strainer over a collector vessel and spread a thin cotton cloth over it. Pour the curdled milk on the strainer so that the curds are separated in the cloth and the whey is collected in the vessel at the bottom.
- Tie the cloth using two alternate ends of the cloth. Use the other two ends to tie the cloth to a churner or any other straight rod like object.
- Allow the churner to rest atop a hollow vessel so that the remaining liquid, if any is collected in the vessel and the paneer turns soft and firm. Keep the suspension undisturbed for 1 hour.
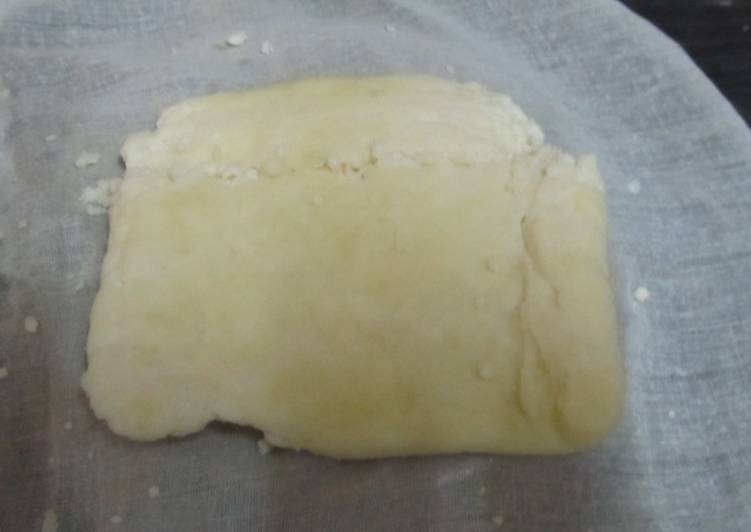
- When all the water is drained out, untie the cloth and wrap the cloth over the paneer. Shape it in the form of a rectangular block.
- Place it atop an upside down turned vessel kept inside another vessel. Place some pressing heavy weights on top of the rectangular block so that the block turns firm. (You can use any heavy weight, I have used a grinding stone and a dosa pan made of stone to serve the purpose)
- Keep aside the balanced weight set up for around 4 hours.
- After 4 hours, keep the paneer in fridge for 1 hour and then cut it into rectangular cubes. The left over whey which is a co-product of cheese production can be used for cooking as a substitute for water since it is rich in protein.
- Note : The more milk you use, the more paneer you get. I have used just 1/2 a litre of milk which gives me around 100 gms of paneer. The milk should be whole milk and not skimmed milk.
Tie it tightly and keep heavy weight on top it. At home, all of us prefer homemade paneer as it is fresh and no preservatives or additives are added. You can easily get soft and porous paneer from After cooling you get a block of cottage cheese which can be used for making a variety of paneer recipes. Unlike many other kinds of cheese in the. How to make cottage cheese or paneer at home.
So that is going to wrap it up for this special food homemade paneer (cottage cheese) recipe. Thanks so much for your time. I’m confident that you will make this at home. There’s gonna be more interesting food at home recipes coming up. Remember to bookmark this page in your browser, and share it to your loved ones, friends and colleague. Thanks again for reading. Go on get cooking!